
Touch GIS offers superior drawing tools that make it an ideal mapping application for professionals who require precision and detail in their work. The app's drawing tools enable users to create and edit points, lines, polygons, and circles with ease, providing a high level of accuracy and control.
Users can create with precision using Touch GIS’s unique pan-and-zoom approach, draw freehand, and edit existing features with just a few taps. The app's advanced drawing tools enable users to create highly detailed and accurate map data that can be used for various purposes, including field data collection, environmental analysis, and site planning.
Here’s a quick overview of Touch GIS’s powerful drawing tools:
Placing a Point Feature
Follow these steps to add a point type feature class to your project:
1. Begin by tapping the blue '+' button in bottom right corner of the map. Here you'll see all available feature classes. .
2. Select the point type feature class that you would like to place.
3. Crosshairs will appear in the center of your map. Pan and zoom the map behind the crosshair to select the location where you would like to add your point.
4. Tap Place Point
After placing your point on the map, you can add any necessary attributes via the Layers panel.
Drawing a Line Feature
Touch GIS offers 3 methods for drawing a line feature. Begin by tapping the blue '+' button in bottom right corner of the map. Here you'll see all available feature classes. Select the line type feature class you want to add to your project.
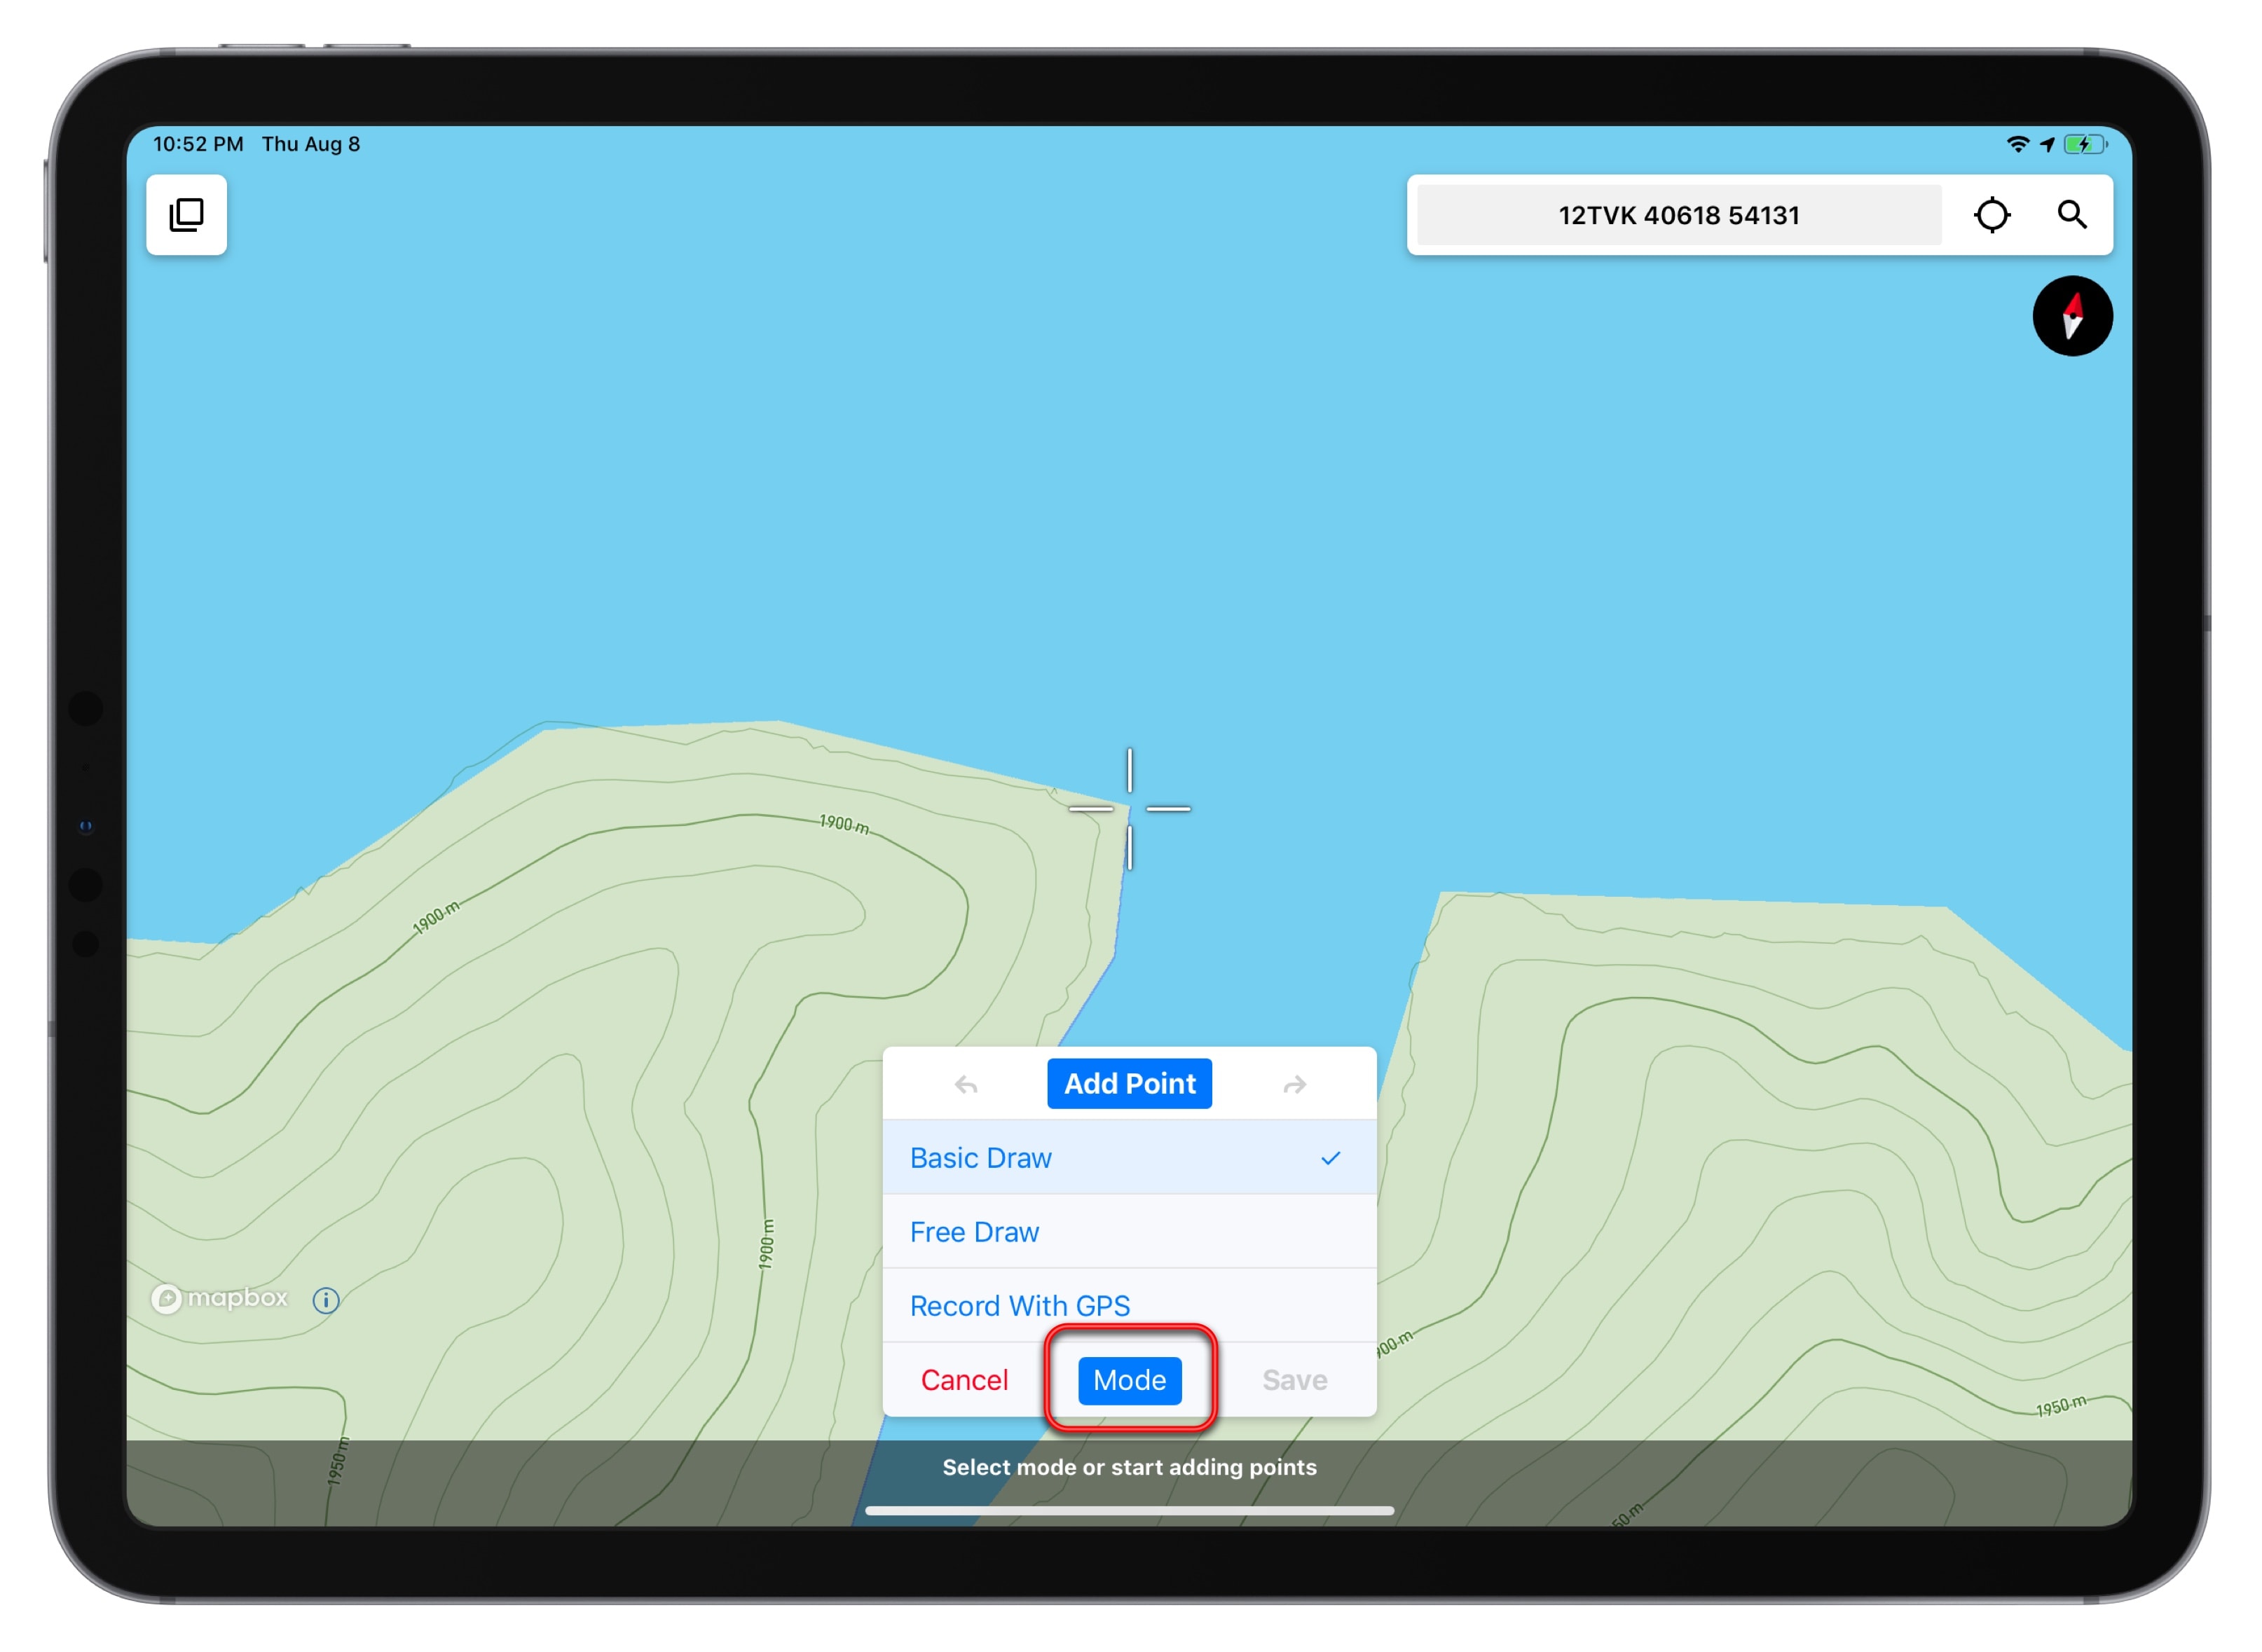
Basic Draw is the default drawing mode in Touch GIS. Tap 'Mode' at the bottom center of the map to access the Free Draw or Record With GPS methods.
Basic Draw Method:
1. Start by panning and zooming the map so your desired staring location is in the crosshairs.
2. Tap 'Add Point' to add the first point of your line.
3. Pan and zoom to position the next desired point in the crosshairs.
4. Tap 'Add Point' to add the second point in your line.
5. Repeat this step until you've added all the points necessary to draw your line feature.
6. Tap 'Save' to add your line to your layers and add attributes.
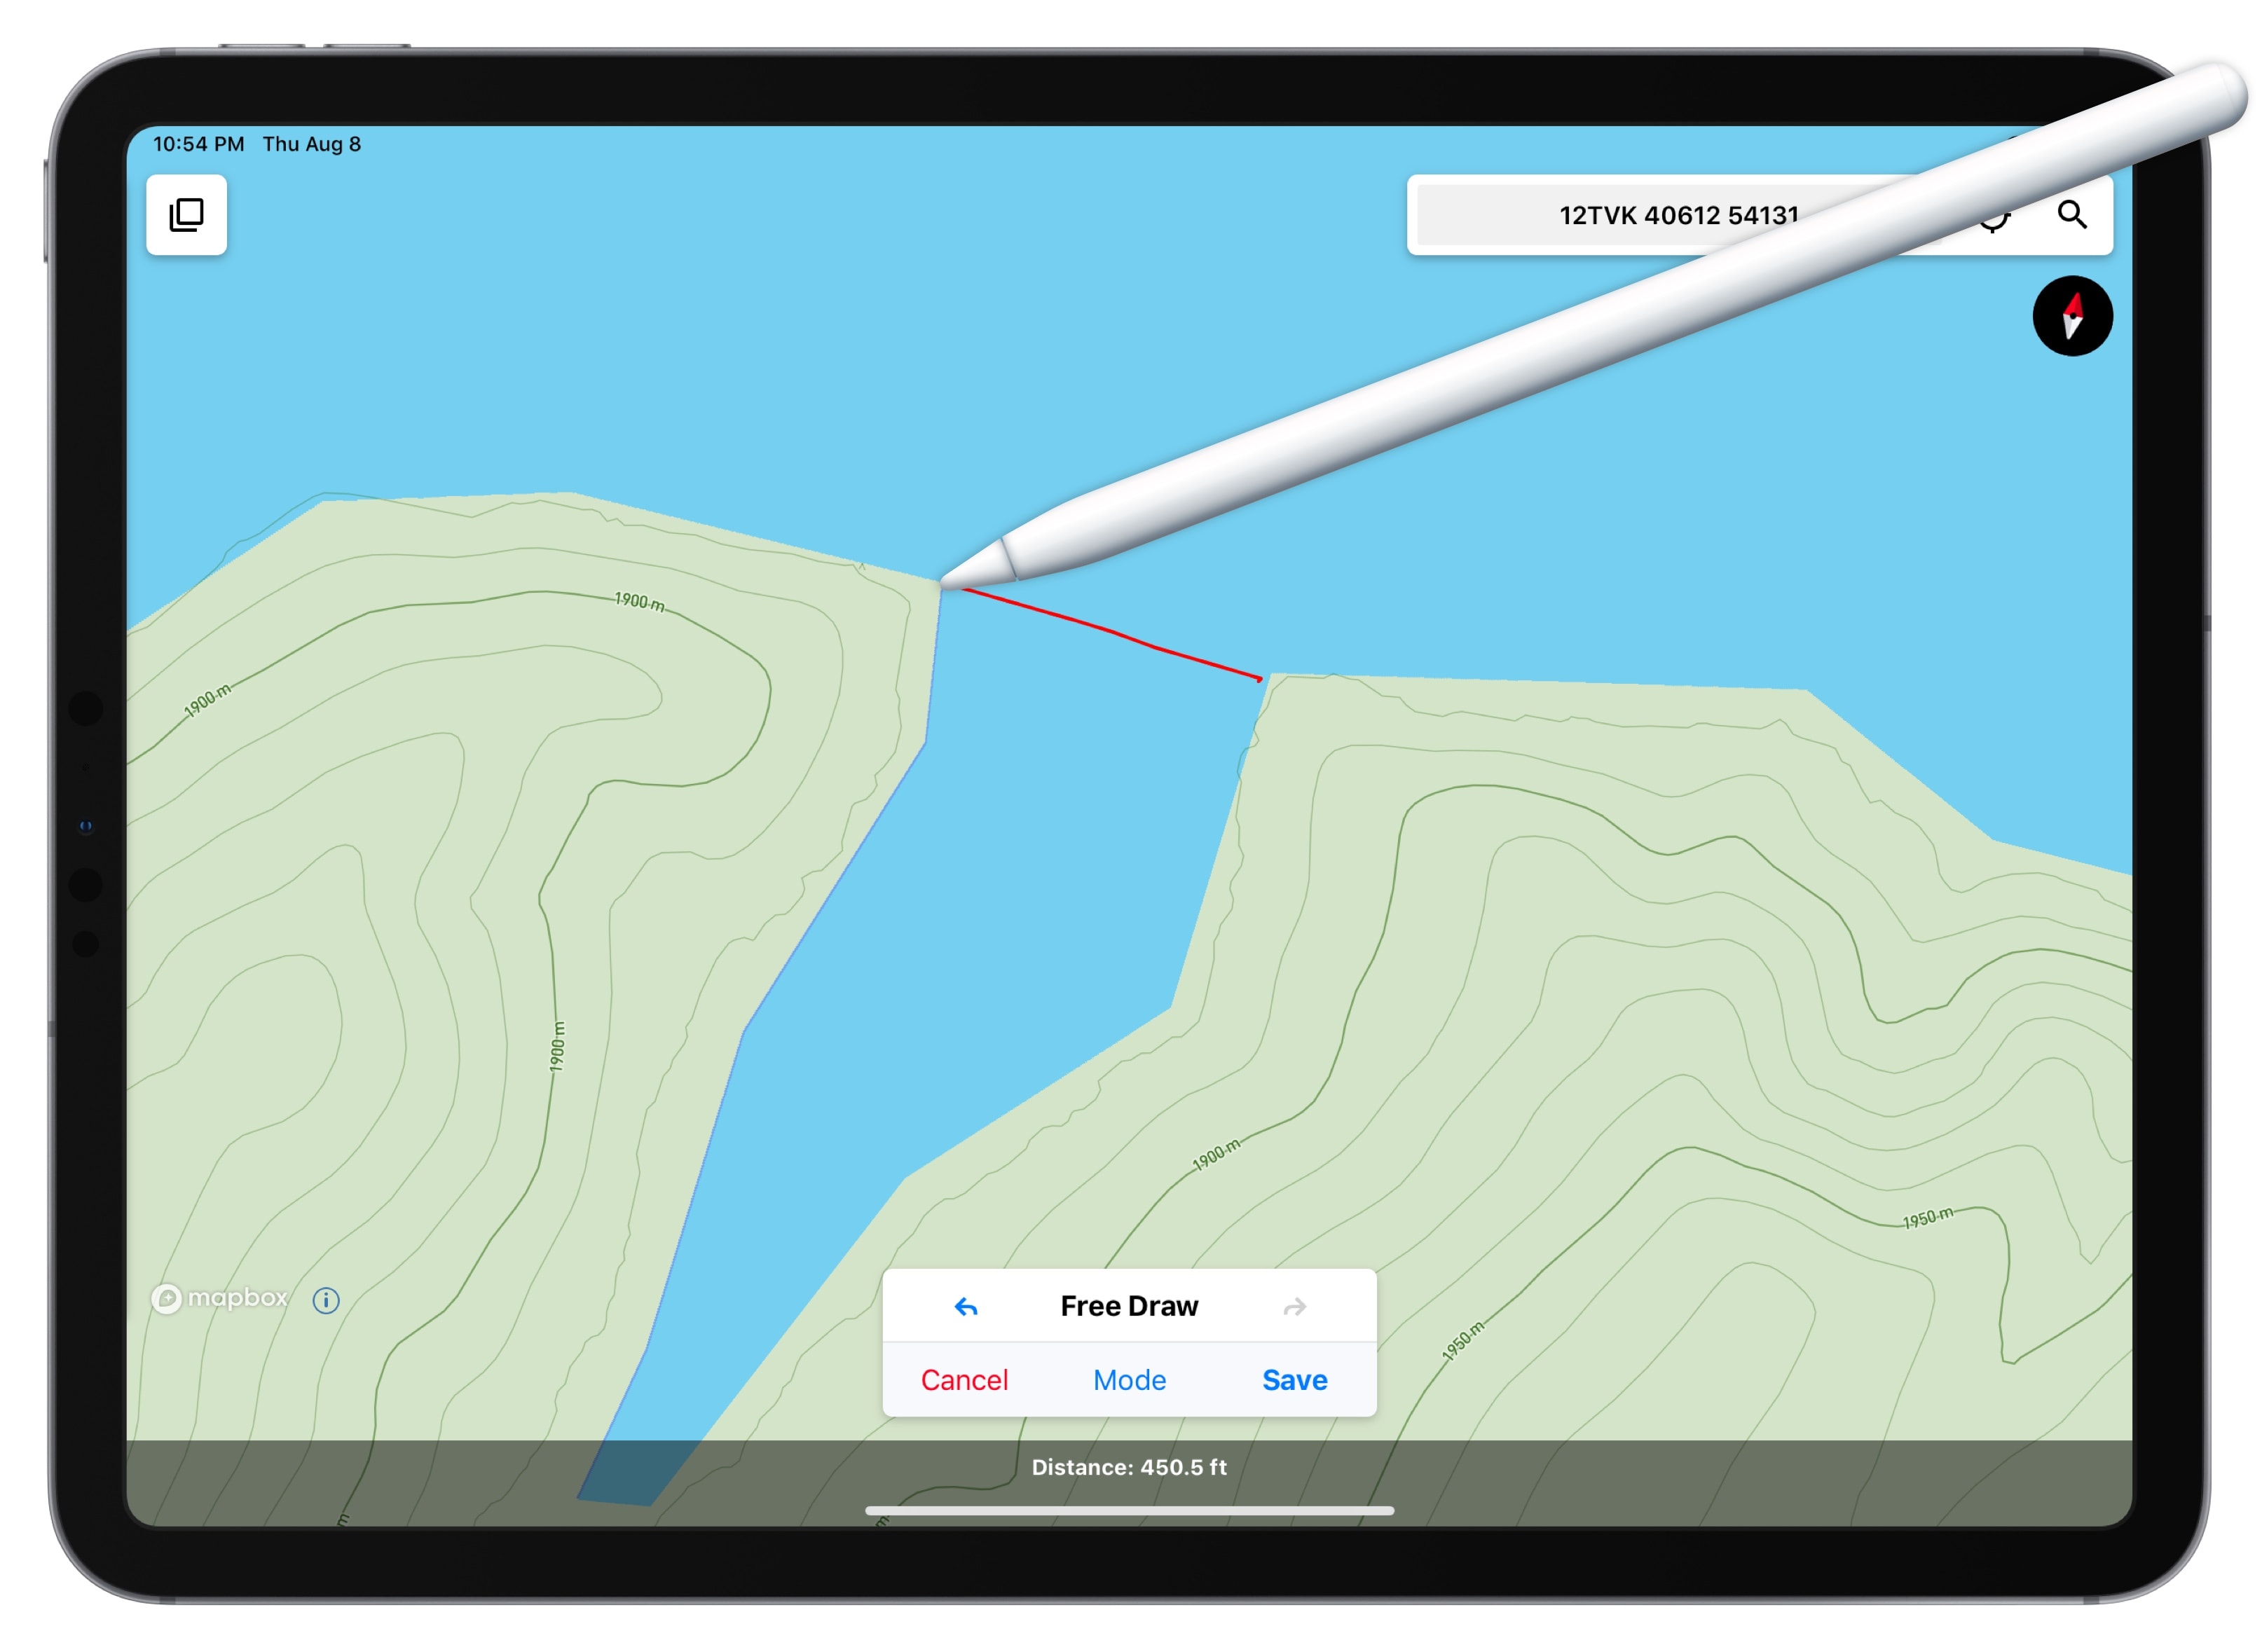
Free Draw Method:
This method allows you to use your finger or a stylus (preferably an Apple pencil) to draw a line. This method is useful for quick data collection where accuracy is less important.
Record With GPS Method: Make sure your device is located where you want to start recording before you begin.
1. Tap 'Start Recording'
2. Begin moving and proceed to the end of your line.
3. Tap 'Save' when you're done recording to add the line to your layers and add attributes.
Drawing a Polygon Feature
Touch GIS offers 3 methods for drawing a polygon feature. Begin by tapping the blue '+' button in bottom right corner of the map. Here you'll see all available feature classes. Select the polygon type feature class you want to add to your project.
Basic Draw is the default drawing mode in Touch GIS. Tap 'Mode' at the bottom center of the map to access the Free Draw or Record With GPS methods.
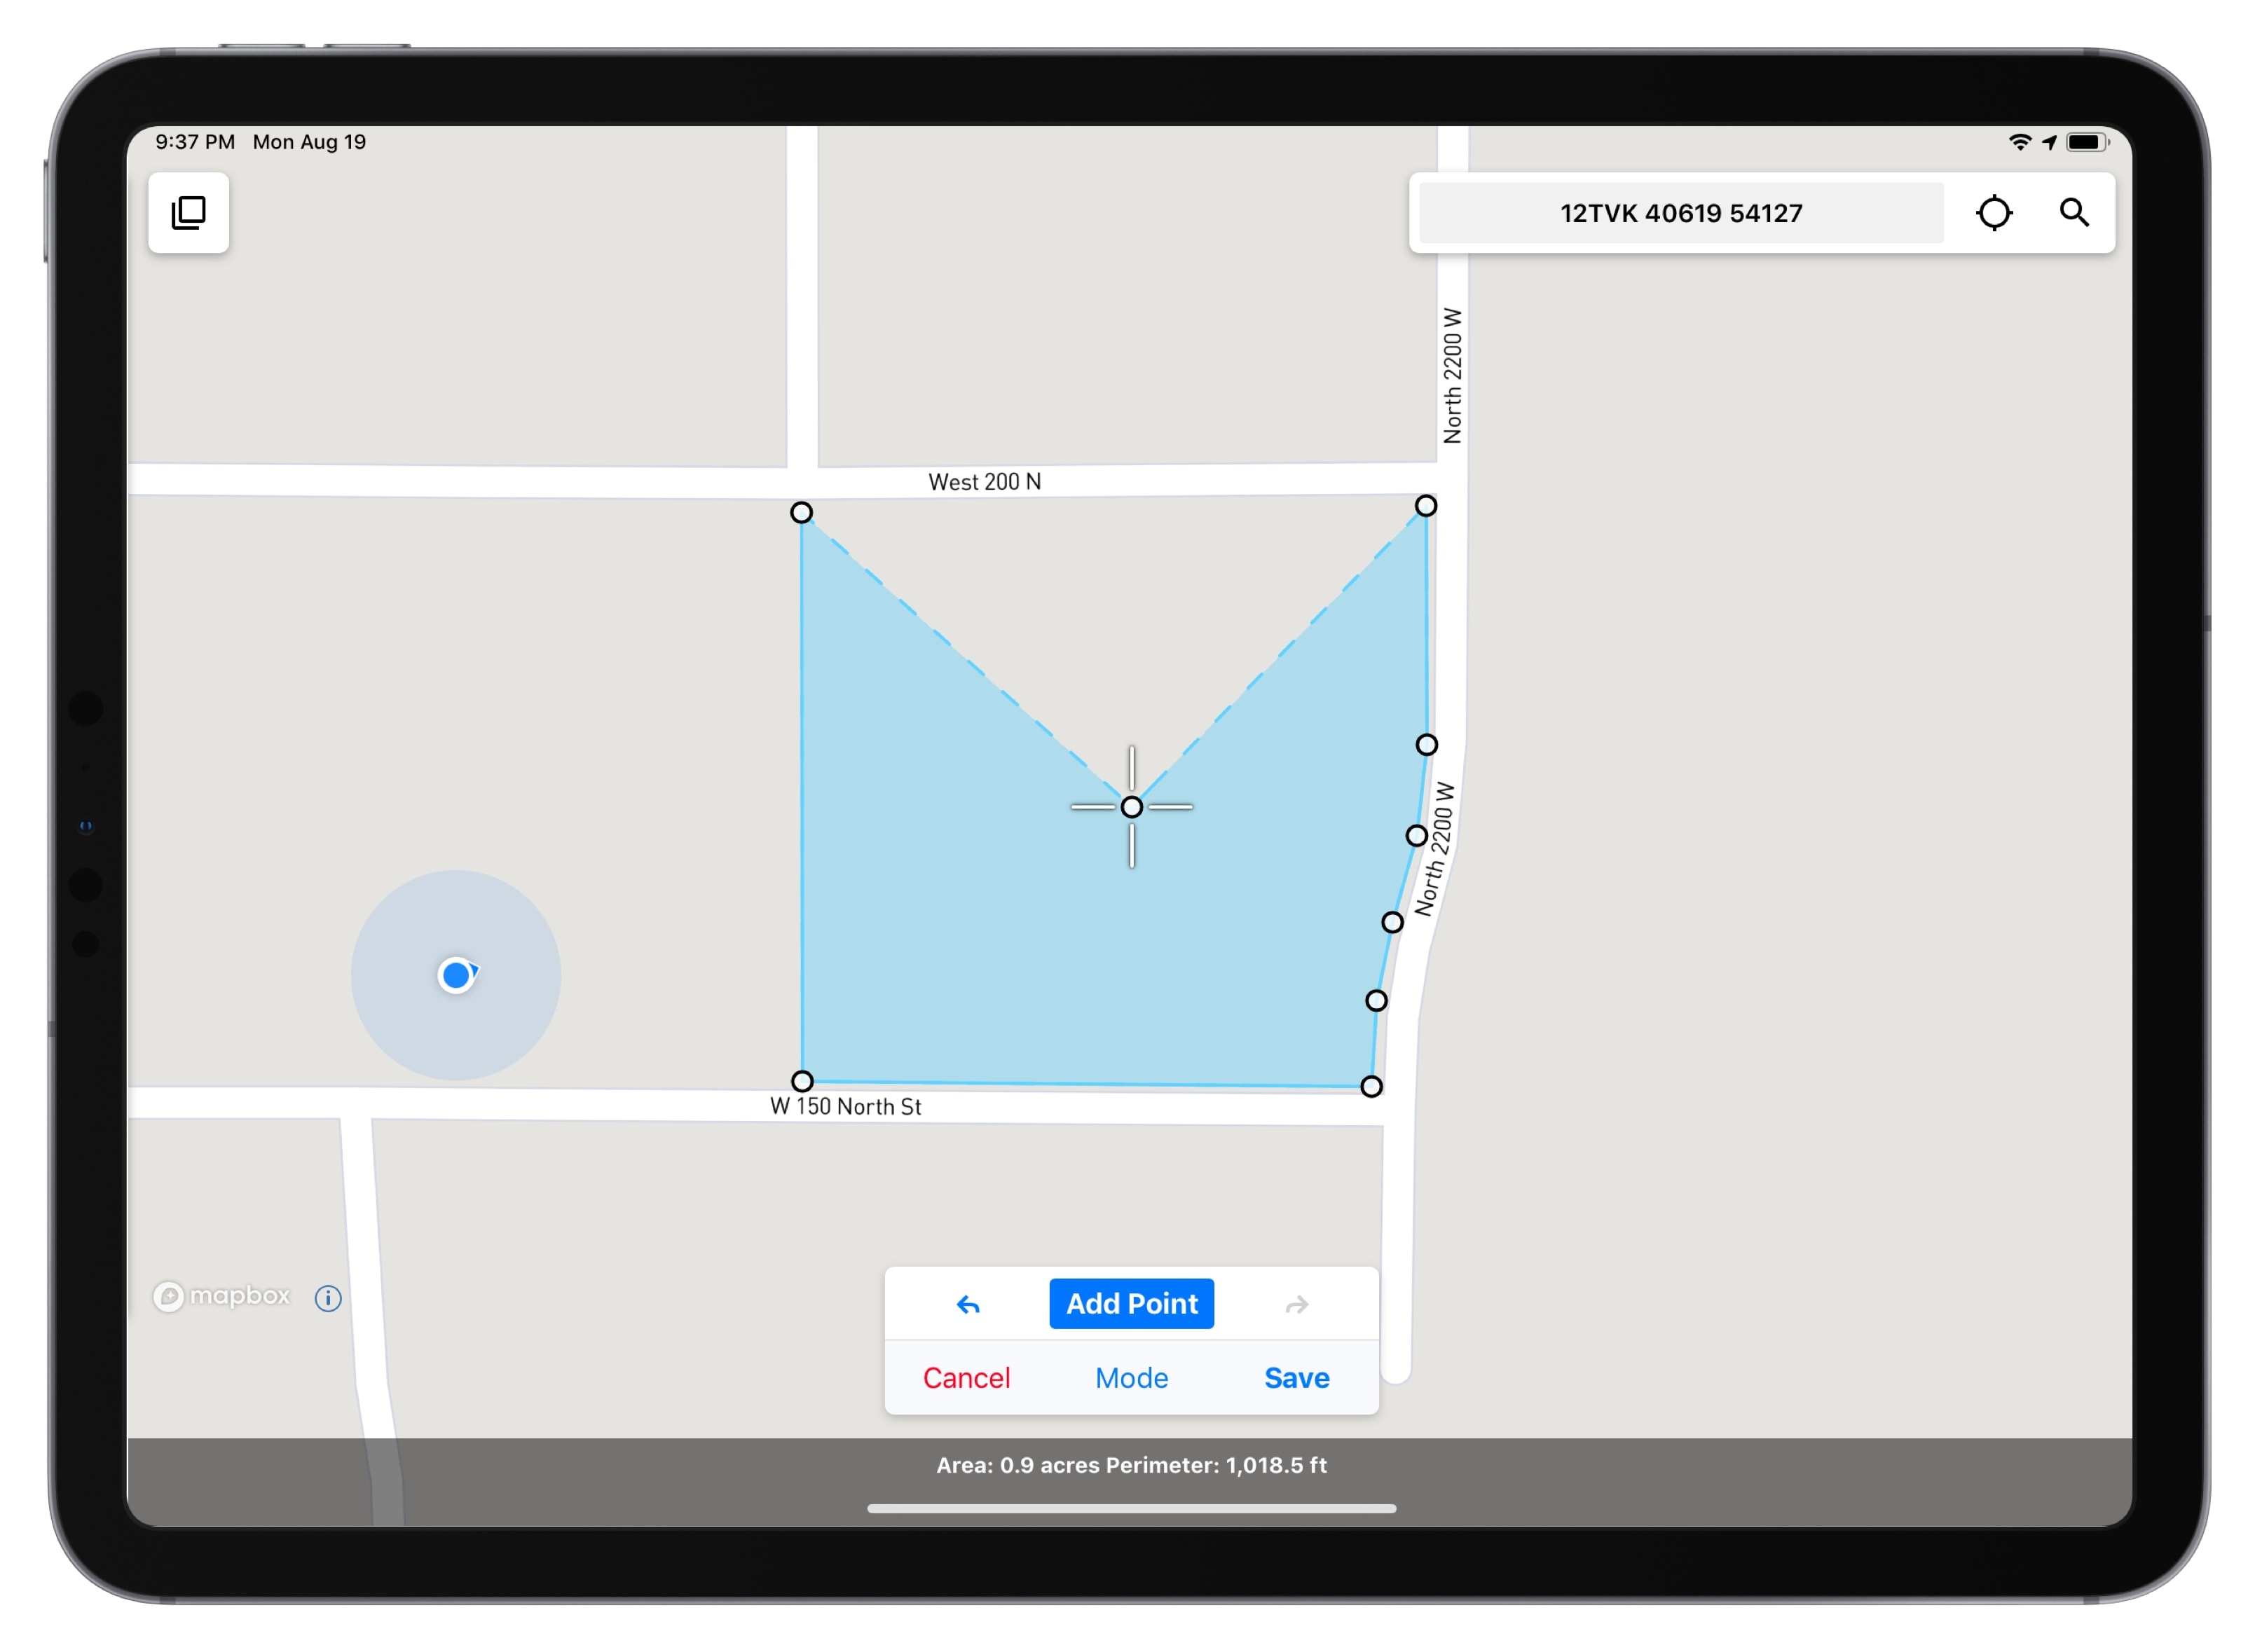
Basic Draw Method:
1. Start by panning and zooming the map so your desired staring location is in the crosshairs.
2. Tap 'Add Point' to add the first point of your polygon.
3. Pan and zoom to position the next desired point in the crosshairs.
4. Tap 'Add Point' to add the second point in your polygon.
5. Repeat this step until you've added all the points necessary to draw your polyong feature. Note: A polygon feature must 'close', so the first and last point draw will automatically connect to make a solid shape.
6. Tap 'Save' to add the polygon feature to your layers and add attributes.
Tip: You can undo and redo point placements in your polygon if needed using the buttons to the left and right of the 'Add Point' button.
Free Draw Method:
This method allows you to use your finger or a stylus (preferably an Apple pencil) to draw a polygon. This method is useful for quick data collection where accuracy is less important.
Record With GPS Method:
Make sure your device is located where you want to start recording before you begin.
1. Tap 'Start Recording'
2. Begin moving and proceed move along the perimeter of your polygon.
3. Tap 'Save' when you're done recording to add the polygon feature to your layers and add attributes.
Drawing a Circle Feature
Begin by tapping the blue '+' button in bottom right corner of the map. Here you'll see all available feature classes. Select the circle type feature class you want to add to your project.
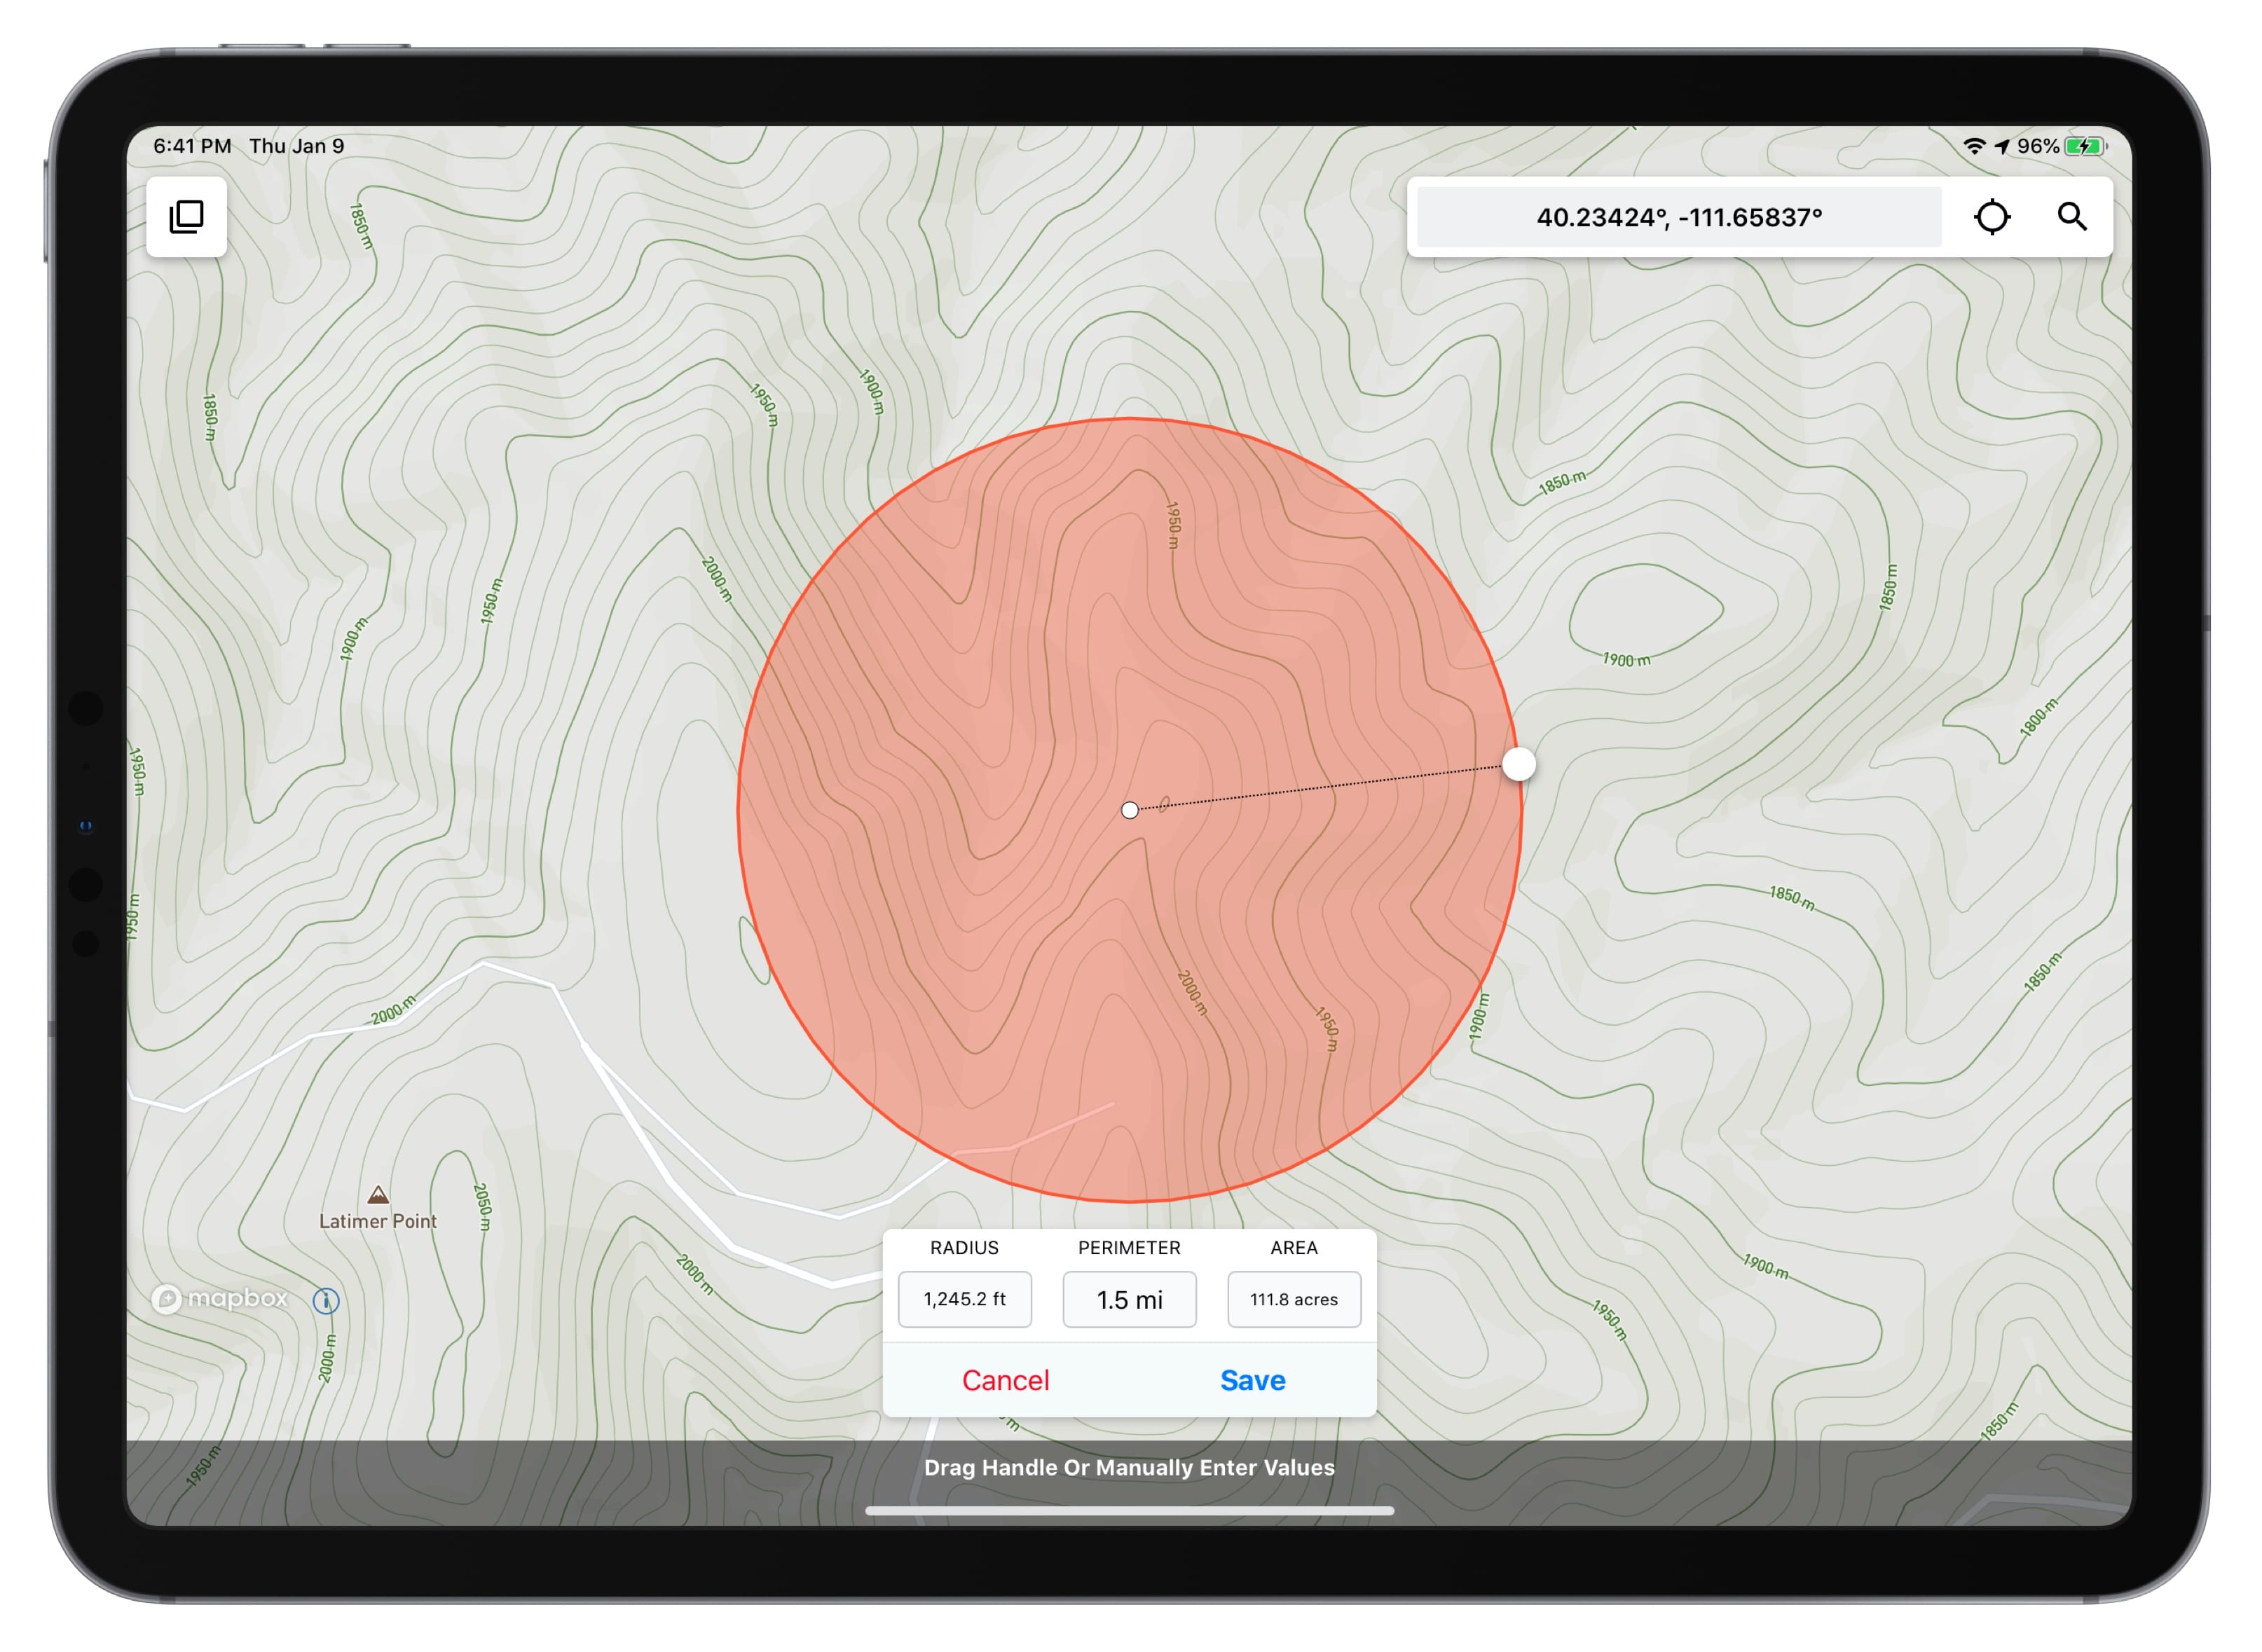
Step 1 - Set Center
The first step in drawing a circle feature is setting the center point. Pan & zoom on the map to set the crosshairs and then tap 'Set Center'.
Step 2, Option 1 - Drag to Set Radius
After setting the center point you'll have the option to drag a handle to set your circles radius. Radius, Perimeter, and Area values are visible while doing this to help you get the correct size. You can pinch to zoom out on the map if you need more space to move the handle. When you're done setting the size of your circle tap 'Save' to add it to your layers.
Step 2, Option 2 - Manually Enter Values
If you know the Radius, Perminter, or Area of the feature you're creating you can manually enter these values by tapping the text fields at the bottom of the screen. When you change one value, the others will automatically be updated.
Touch GIS's superior drawing tools provide users with the flexibility and precision needed to create accurate and detailed maps for a variety of applications.
View our support documentation for more information about drawing features >