For field geologists, it’s often not enough to know where a geologic feature is located. Often times it’s helpful to get a sense for how that feature is oriented. Understanding a feature’s alignment along a compass direction, and how it’s tilted can aid in understanding how that feature fits into the bigger picture. The standard way to measure the orientation of a structural or surface feature is to use a magnetic compass in combination with a clinometer, which are often combined in tools like a Brunton compass to make the process easier.
Even with specialized tools, however, taking measurements and recording them in your data collection forms can be time consuming and error-prone. Some opportunities for error include limited instrument accuracy, misreading the instrument, incorrectly transcribing the reading, or using different conventions from your team members. To reduce the opportunity for errors, increase the reliability and repeatability of measurements, and save you time and energy in the field, Touch GIS combines a digital clinometer and compass in the Attitude Measurement Tool to make the process as easy, fast, and accurate as possible.
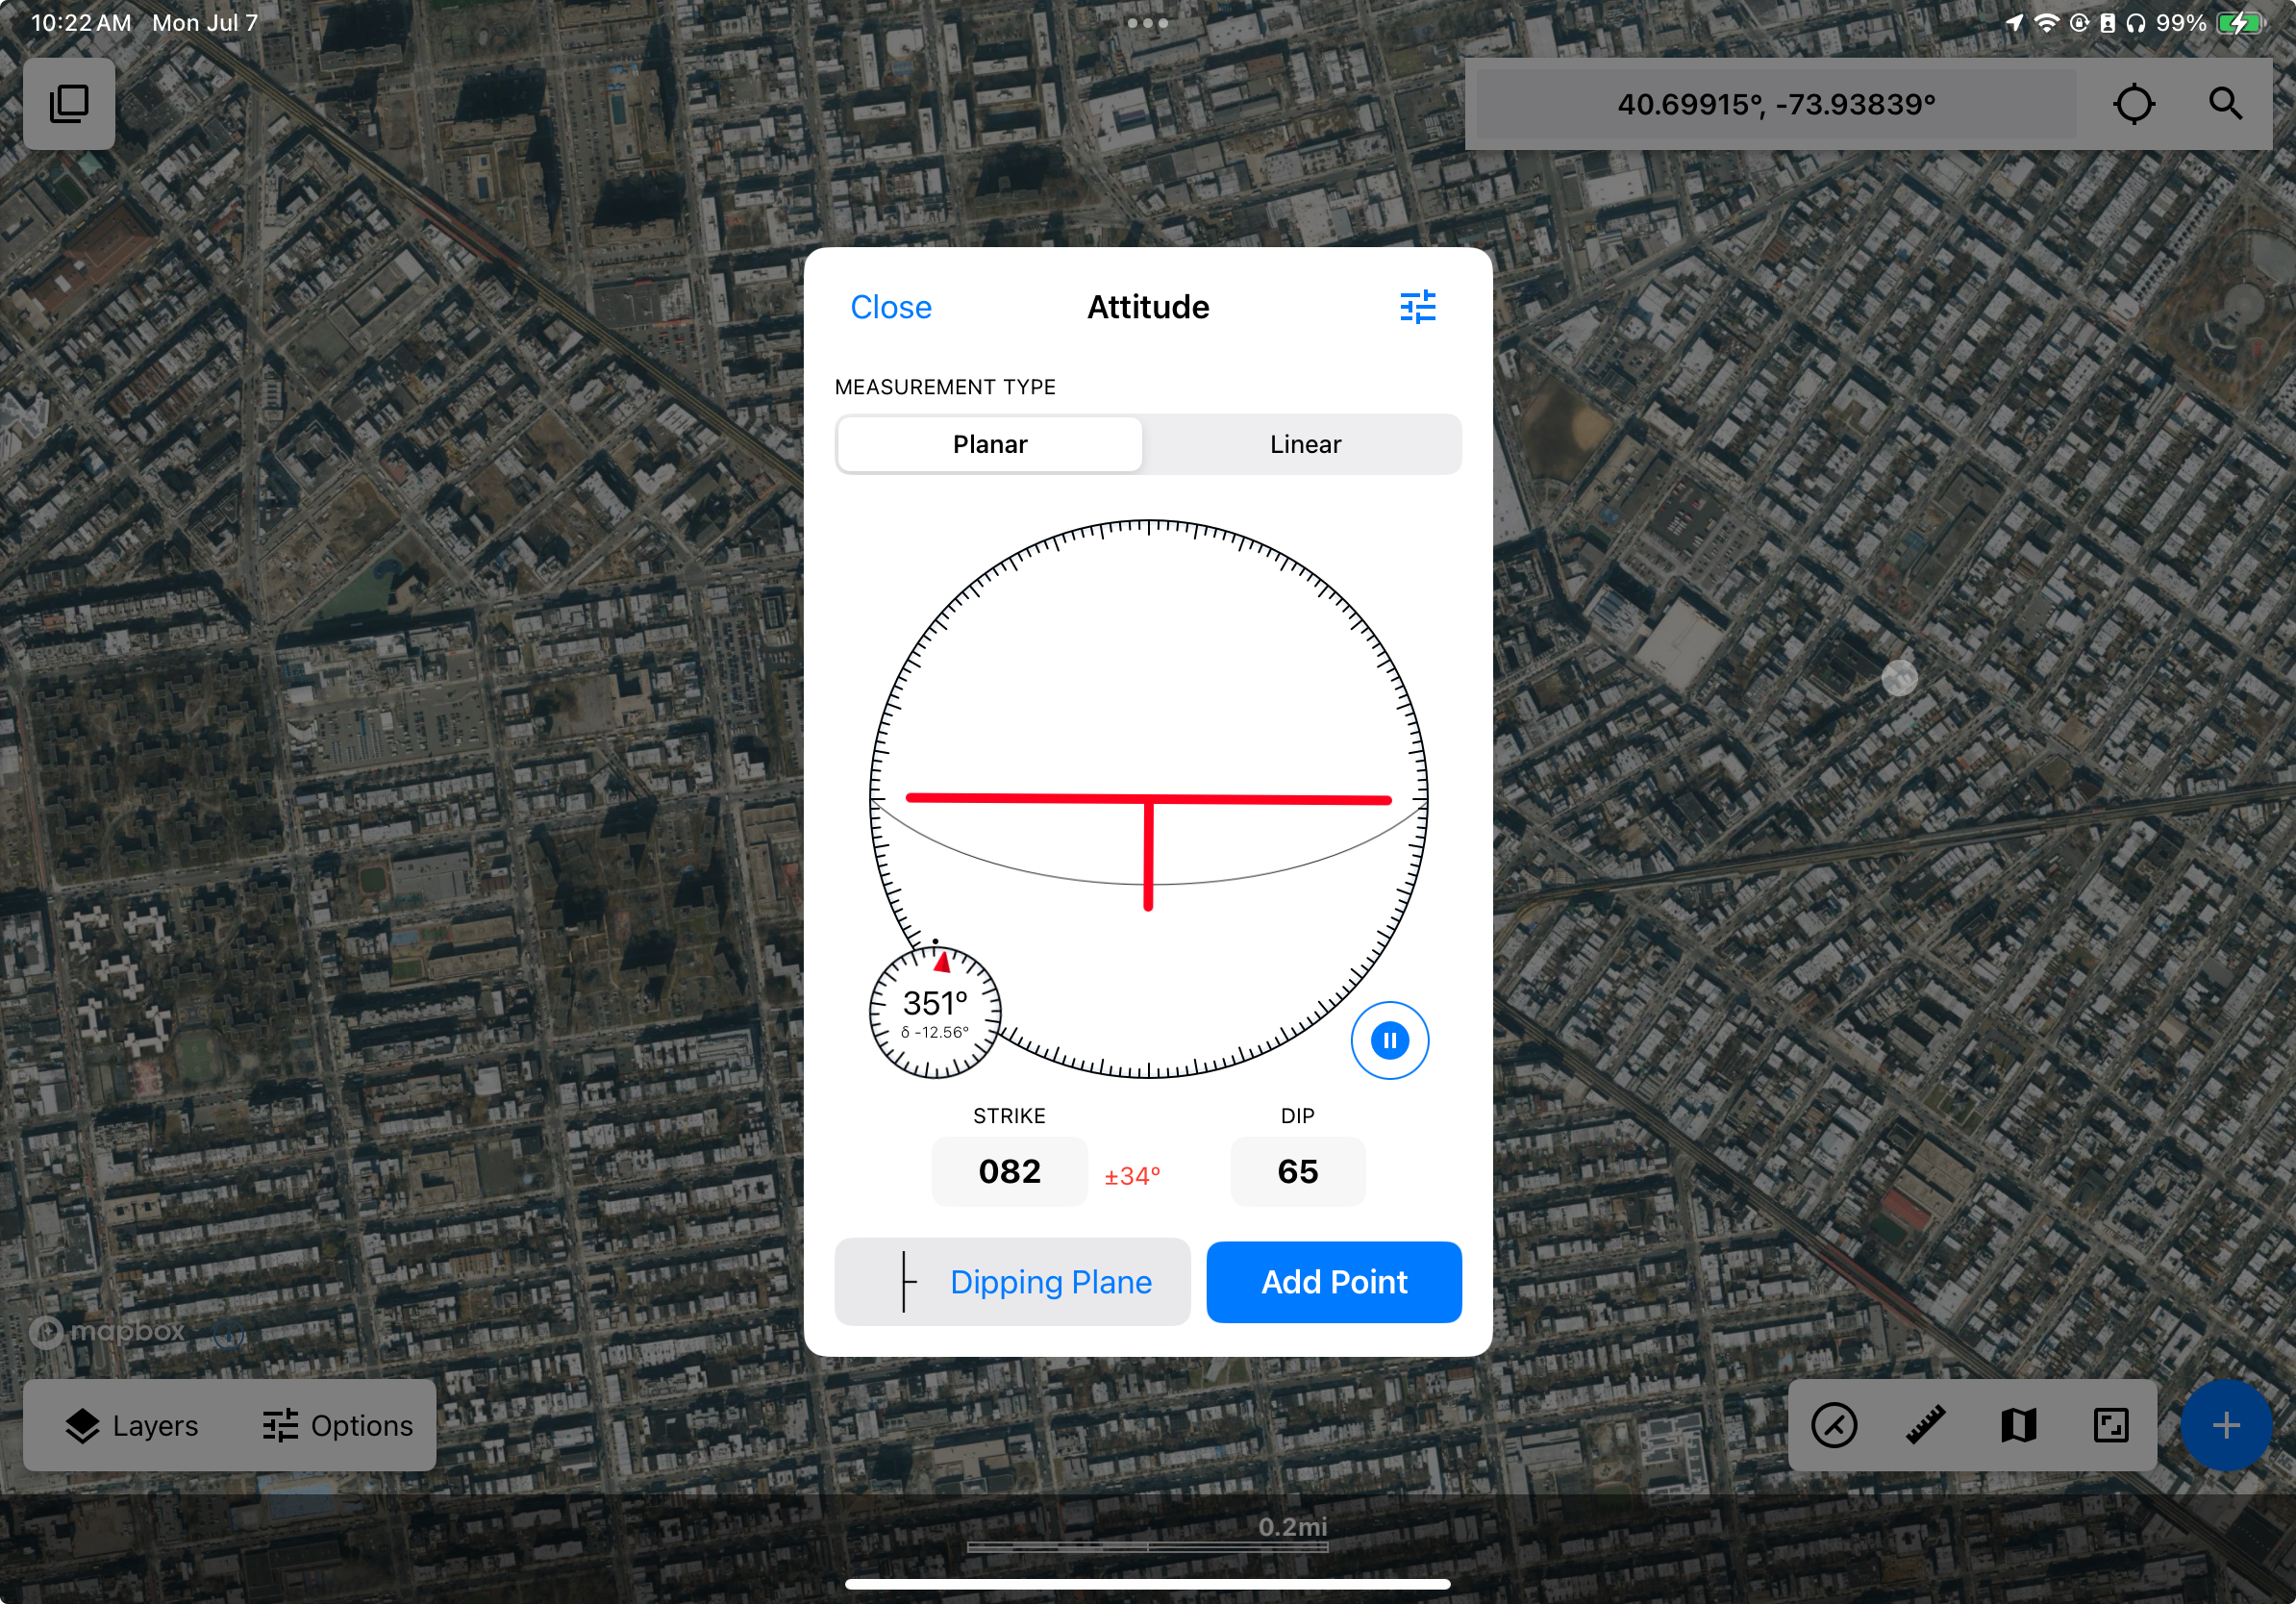
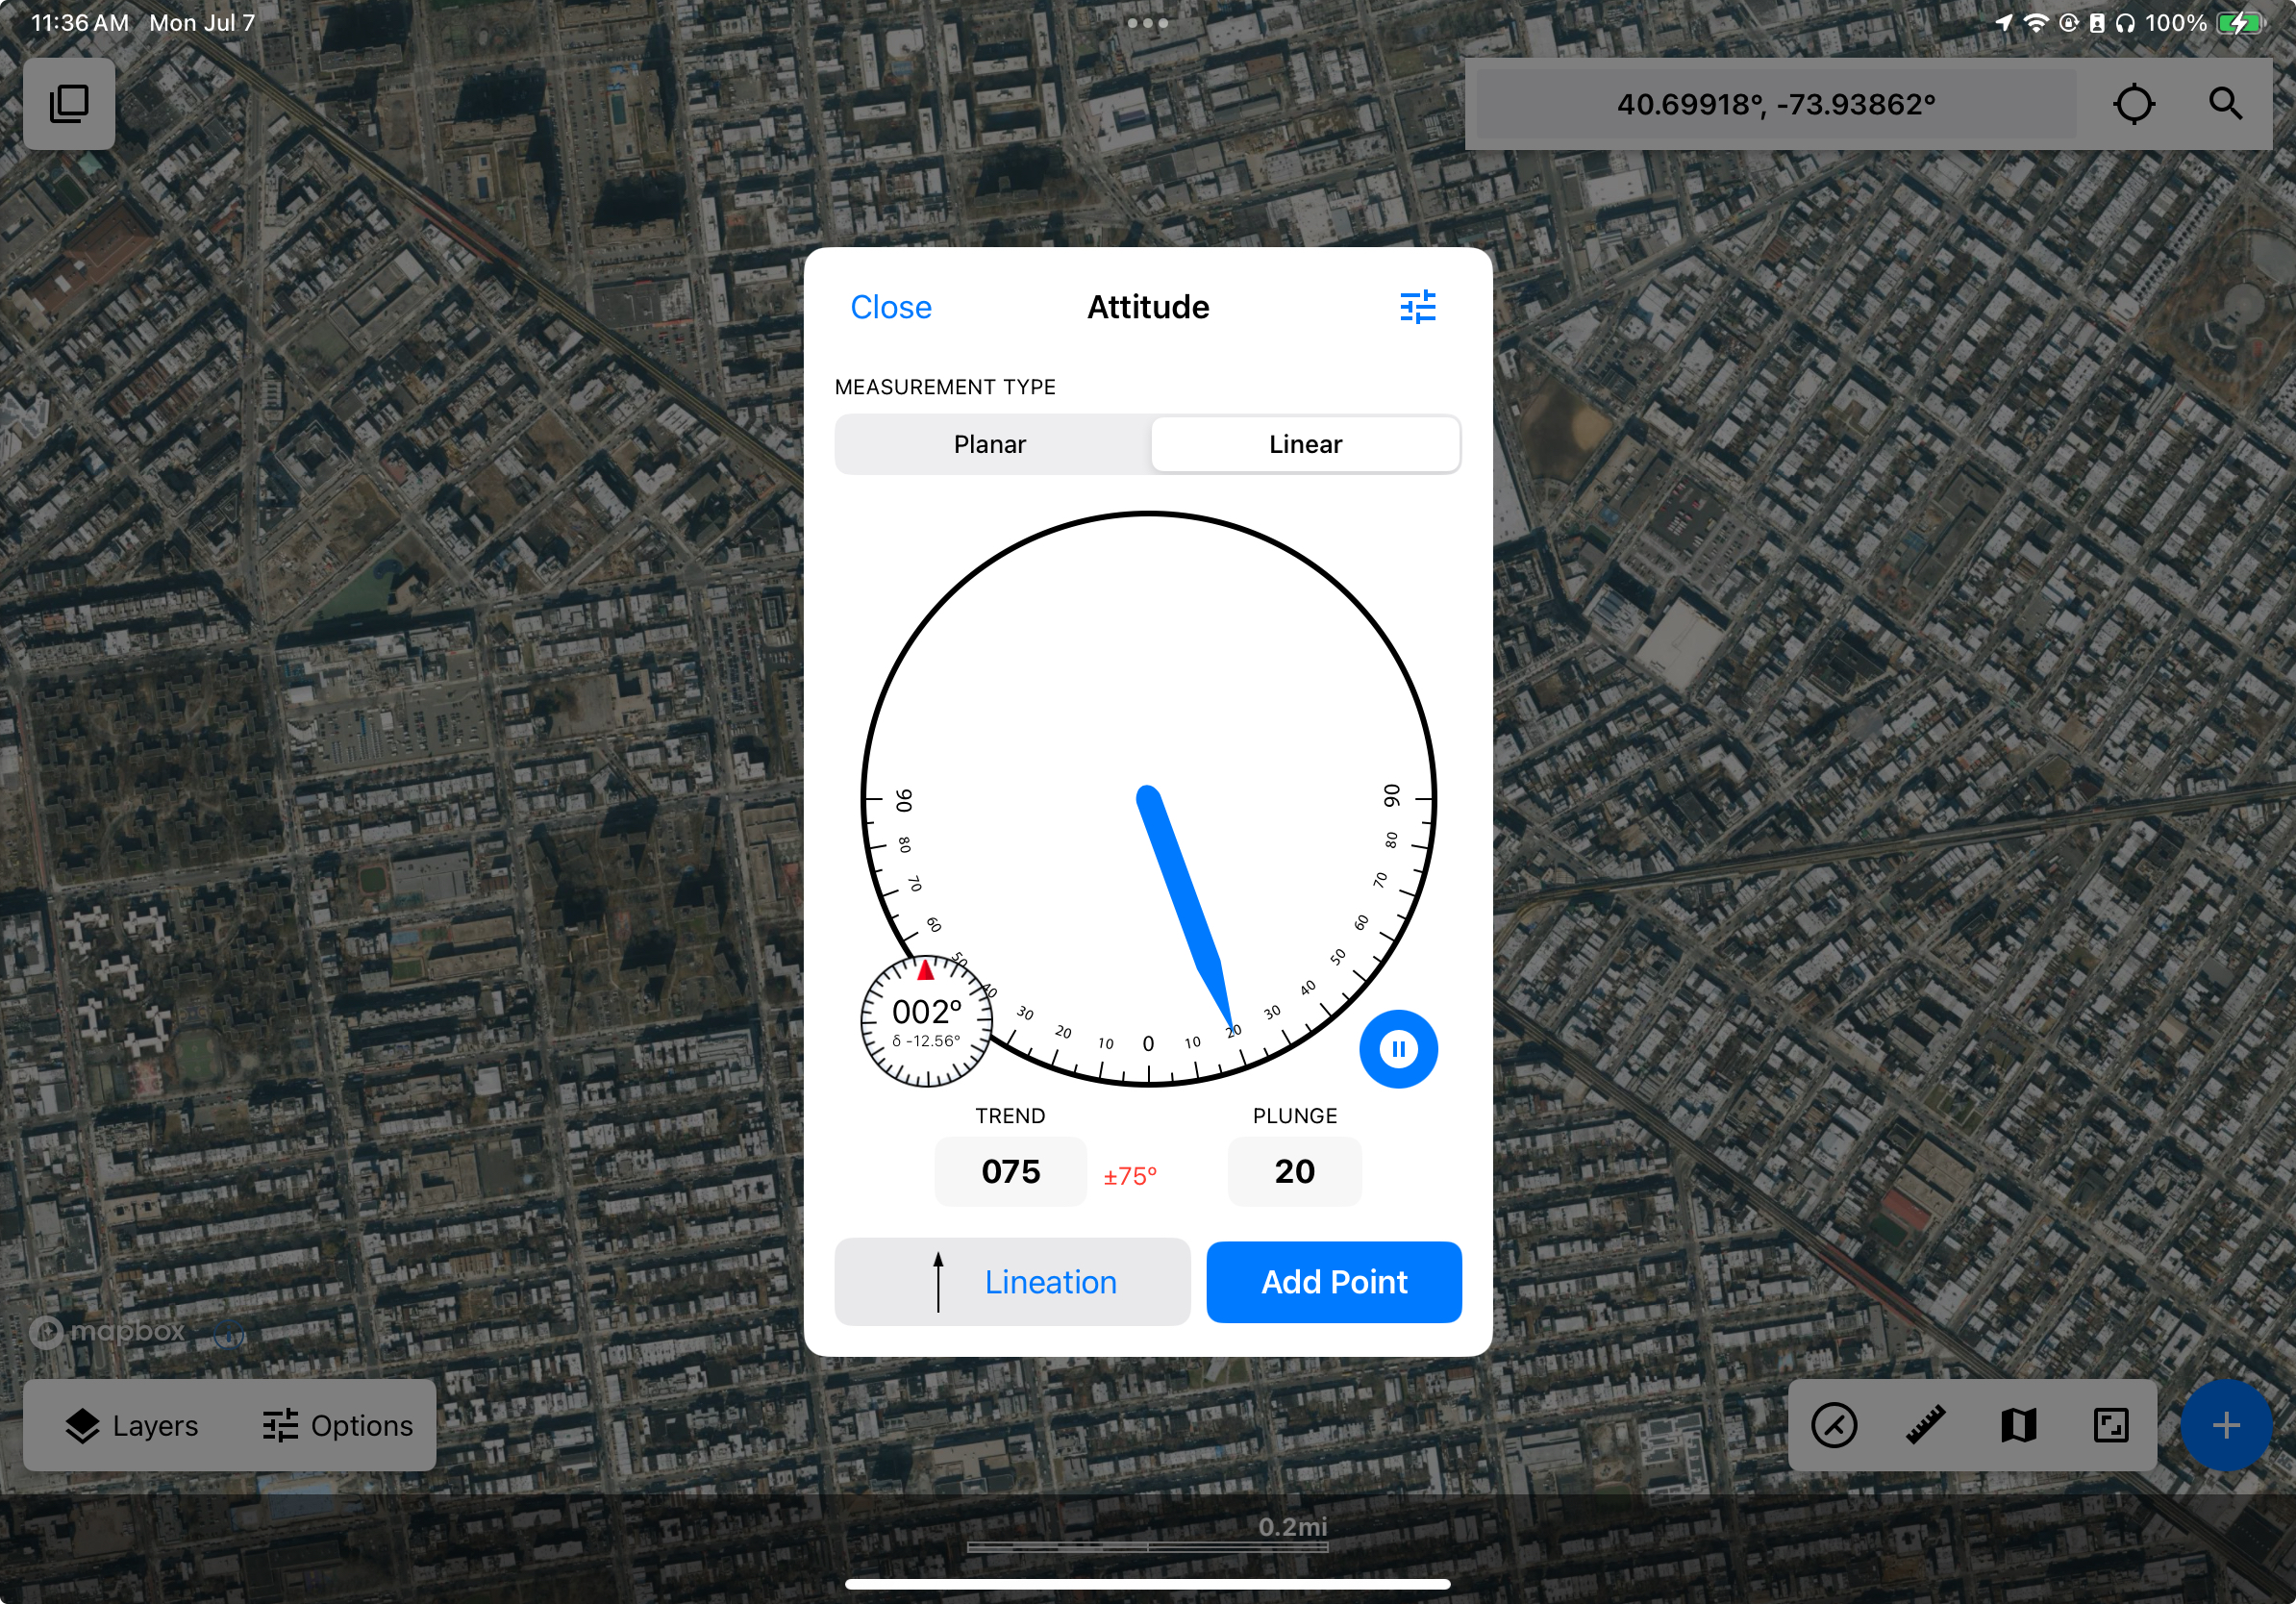
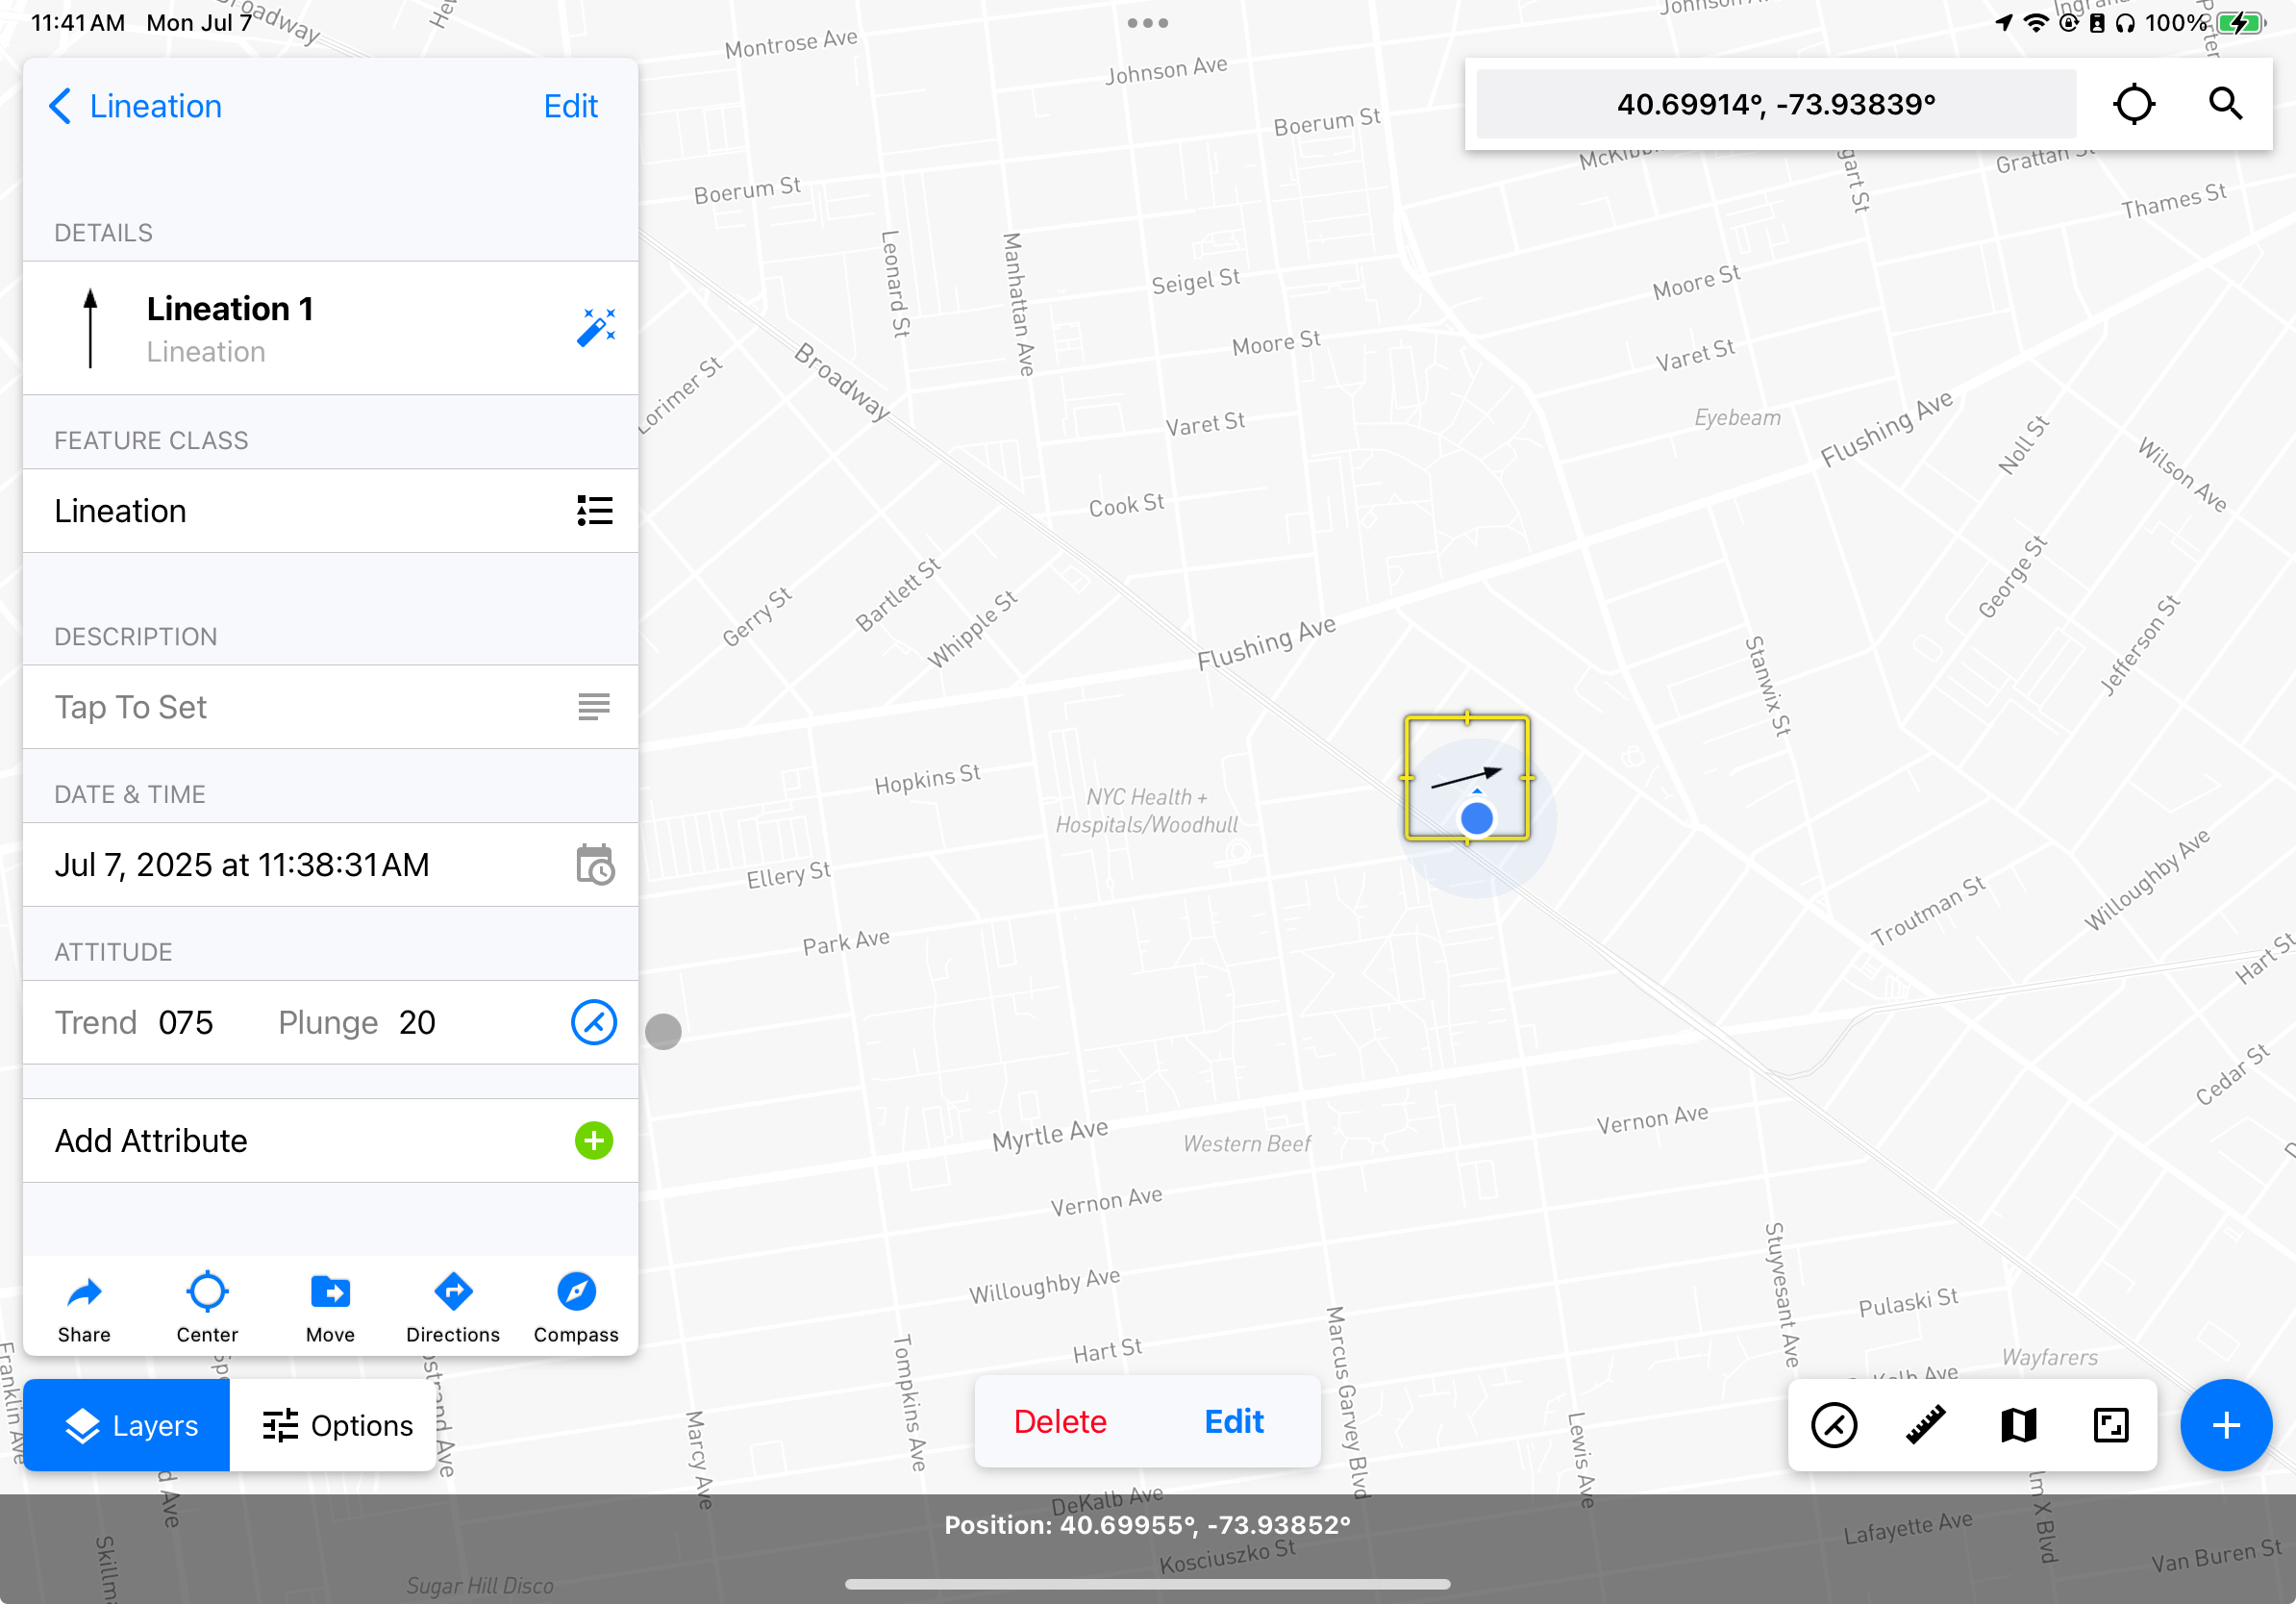
Our attitude tool supports measuring the orientation of planar surfaces using either Strike and Dip or Dip and Dip Direction, as well as linear features using Trend and Plunge. When combined with our custom attitude attributes, recording these measurements reliably takes just a single tap.
Check out this video showing how to use the Attitude tool in the field to quickly record either strike and dip or trend and plunge measurements:
How does it work?
We use the magnetometer, gyroscope, and accelerometers in the device to determine how its oriented in three dimensions. Then we project that orientation onto a surface depending on the type of measurement being taken.
For planar measurements, the fact that the device is a plane is very useful! This means that as long as the device is aligned closely with the surface that you want to measure, then the device’s planar orientation will match the surface being measured.
There are two main ways to do this:
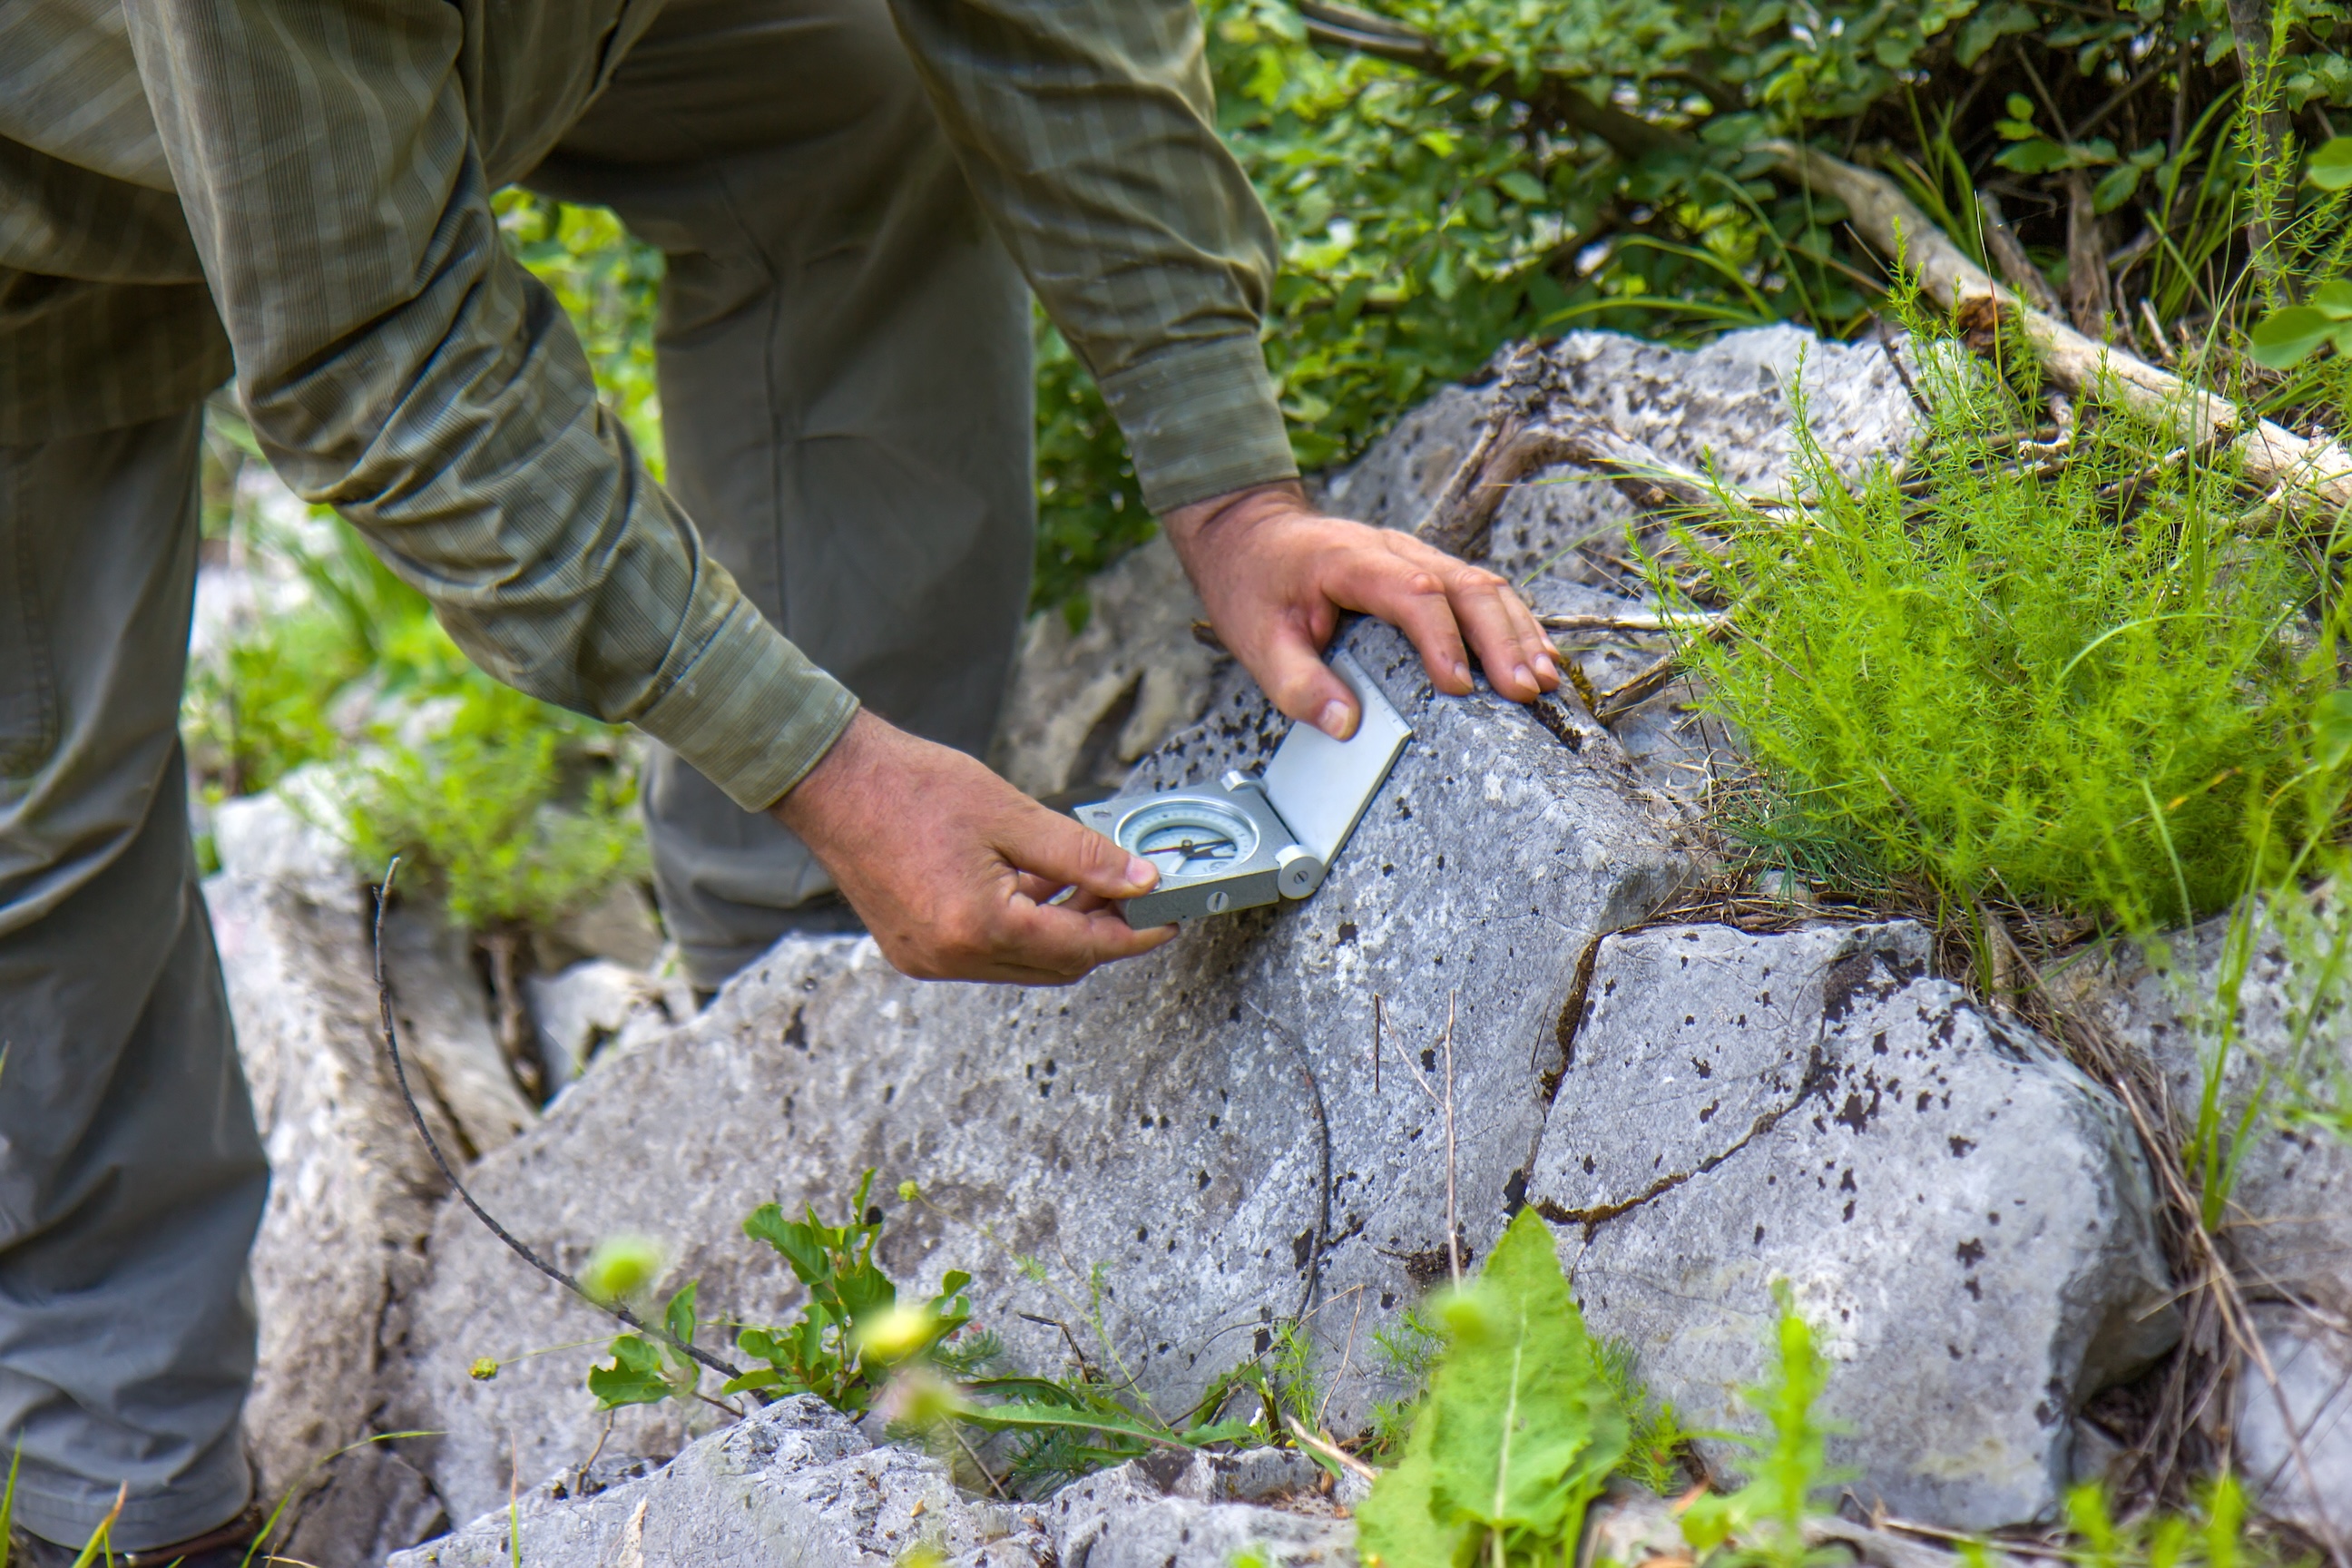
- Hold the back of the device on the surface you want to measure directly, like so:

- Hold the device up and align it visually with the planar feature to be measured. As long as the device and the surface are parallel, the measurements will be identical.
For linear measurements, instead of using the full plane of the device we only use the long axis for calculating the orientation. This means that taking the measurement just requires you to align one of the long edges with the feature you want to measure. It doesn’t matter which long edge you choose, because both will have the same measurement.

Once you’ve aligned the device properly, you can lock in the measurement by tapping once on the dial. The dial arrow will turn blue to indicate that it’s locked in.
If you’re using our custom attitude attributes, you can now create a new feature with the measurement just by tapping “Add Point”, and the created feature will have the measurement recorded. If configured, the feature icon will rotate on the map to match the directional component of the attitude.
For more in depth information on the Attitude Measurement tool in Touch GIS, please refer to our user guide.
Touch GIS is helping to make geologic mapping faster, easier, and more accurate than ever. Our Attitude Measurement Tool is just one way we’re helping field geologists be more efficient and effective than ever. To learn more about the ideal mobile field mapping and data collection tool for geologists, check out our Touch GIS for Geologic Mapping page.